In this video tutorial, we’re going to step into the wonderful world of stop-motion animation with a simple paper crumple.
The paper crumple is perfect for your first stop-motion project — we all have access to paper, and we can all crumple it up. A quick disclaimer: while I’ll be using some semi-expensive gear for this project, you can actually create stop-motion videos with nothing more than a phone and a free app. The point is to focus on the methods, not the gear.
So let’s take a closer look at those methods.
1. Camera Position
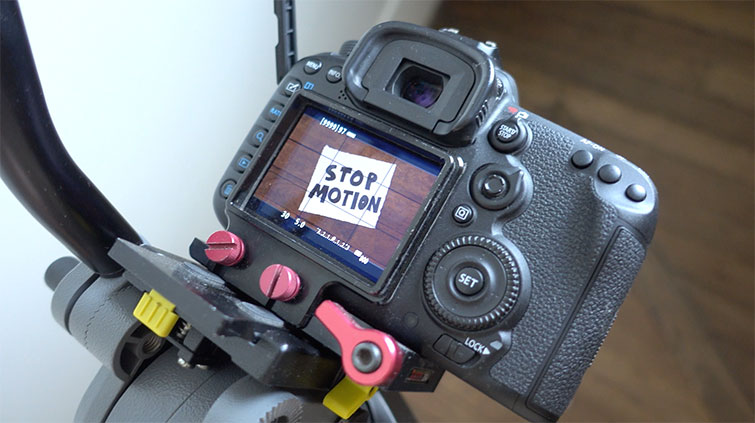
One of the key aspects of making a stop-motion animation work is keeping the camera still. As you can see in the example, all of the action moves in and out of frame while the camera remains stationary. For this reason, it’s important to have a solid rig. I’m using a tripod pointing straight at my paper, which is on the ground. Not all tripods do this, so you may need to use clamps, C-stands, or a GorillaPod depending on the size of your camera. If you plan on shooting a lot of stop-motion animations, you can always build an overhead rig relatively cheaply.
2. Lighting
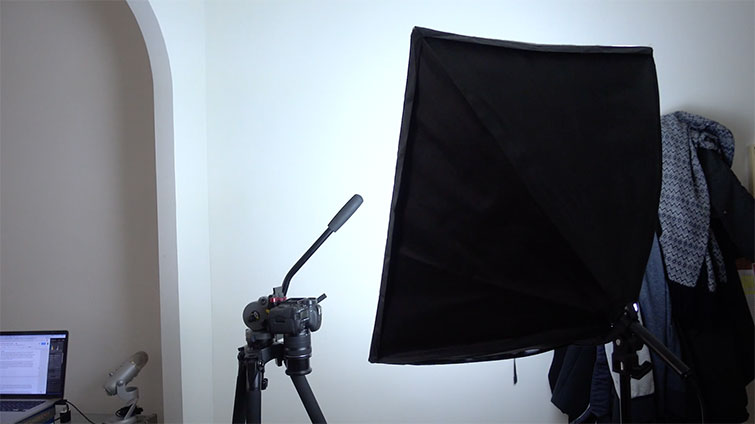
The quality of natural light can change quickly, both in intensity and color. If you shoot stop-motion using natural light, these subtle changes can give your animation a jittery look. If you want something a bit more uniform, then you’ll want to use lights in a controlled environment. Whether you’re using natural light or multiple lights in a studio environment, it’s important to be aware of the positioning. You can easily cast a shadow on your scene, which can mess up a single frame in a complex animation.
3. Shooting
As you may already know, filmmakers capture stop-motion frame by meticulous frame. While the tripod will keep the camera steady, simply pressing the shutter button can shift the frame. To avoid this I’ve tethered my camera to my laptop via a USB cable. This allows me to not only remotely trigger the shutter but also review my images (via Adobe Lightroom). It’s much easier to review images on a large screen. If you can’t tether your camera, play around with your camera’s interval recording settings, or buy a remote.
To create a blocky-style animation I’ll be shooting at 10 frames per second. If I want to get a 5-second animation at 10fps, I’ll need to shoot somewhere around 50 images. To perfectly time this animation, I’ll break the shot into five different sections. Each of these sections will occur over the course of 10 photographs.
- Moves into frame.
- Uncrumples.
- Holds.
- Crumples.
- Moves out of frame.
4. Editing
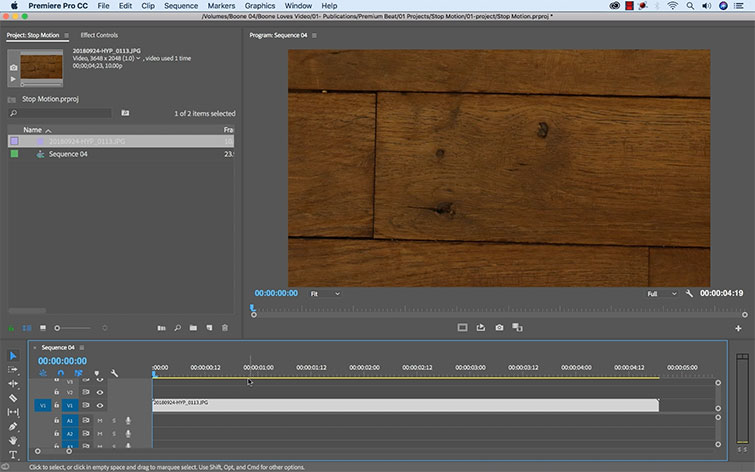
There are a number of ways you can bring these images together in the edit room, but I’m going to using Adobe Premiere Pro. In Premiere Pro select File > Import, grab the first image, and then choose “Image Sequence” under Options. This will bring in the images as a video clip that’s set to 30fps. Now I can grab the clip and select Modify > Interpret Footage and manually input my desired frame rate: 10fps. This method is very versatile, as it allows me to quickly change frame rates and test out various speeds and looks for the animation.
Voilà! my animation is ready to go.
1-D3 MMB A


Recent Comments