
Create a project and import a clip
You must Learn basic editing skills in Adobe Premiere Pro with the Get Started series. Get familiar with the workspace and how to create new projects.
Create a project
You can either create a new project or open an existing one.
What you learned: Create a project
- Open a Premiere Pro project file by double-clicking it, or click Open Project in the Start screen and select a file.
- To create a new project file, click New Project in the Start screen. Choose a name, browse to choose a location for the project file, and click OK.
- To import media files using the Media Browser panel, browse to the files you’d like to import, select the clips you want to work with in Premiere Pro, right-click one of the selected clips, and choose Import. Once the media is imported, you’re ready to edit.
- As you edit, be sure to save your work (choose File > Save) periodically.
- To close your project, choose File > Close Project.
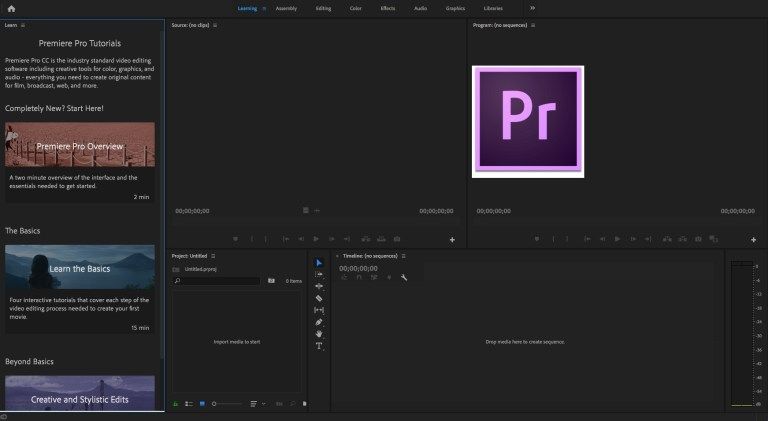
Workspace overview
Understand the basic user interface to become familiar with Premiere Pro.
What you learned: Panels and workspaces
- Panels: Each panel has a specific purpose. You can resize or reposition them. All panels are accessible in the Window menu.
- Workspaces: Preset layouts with panels displayed that are useful for particular tasks, such as editing video or working on audio. To reset a workspace, choose Window > Workspace > Reset to Saved Layout.
- Blue highlight: Only one panel at a time will have a blue highlight, indicating that it is the active panel.
Import media
When you import videos into Premiere Pro, they appear as clips (shortcuts to your media files) in the Project panel.
What you learned: Import media
- Use the Media Browser panel to locate and import your media files. To preview a video in the Source Monitor, double-click it. To import media files, select them and right-click on them to choose Import.
- Bins allow you to organize your clips in the same way that you might organize files in folders on your computer. To create a new bin, click the New Bin button in the Project panel.
Build a sequence
Most of the creative work in Premiere Pro happens when you build a sequence of clips that play, one after another. You’ll need to create a sequence before you can add clips to it.
What you learned: Build a sequence
- When you create a sequence, it appears in the Project panel along with your clips. You can create as many sequences as you want in the same project.
- To create a new sequence, drag one or more clips into the empty Timeline panel, or select one or more clips in the Project panel, right-click on the selection and choose New Sequence from Clip.
- Add more clips by dragging them into the Timeline panel.
- To remove a clip from the sequence, select it and press Backspace (Windows) or Delete (macOS). If you select clips and press Shift+Delete (Windows) or Shift+fn+Delete (macOS), they will be removed without leaving a gap in the sequence.
- https://helpx.adobe.com/premiere-pro/how-to/create-project-import-media.html?playlist=/services/playlist.helpx/products:SG_PREMIEREPRO_1_1/learn-path:get-started/set-header:ccx-designer/playlist:ccl-get-started-1/en_us.json&ref=helpx.adobe.com


Recent Comments