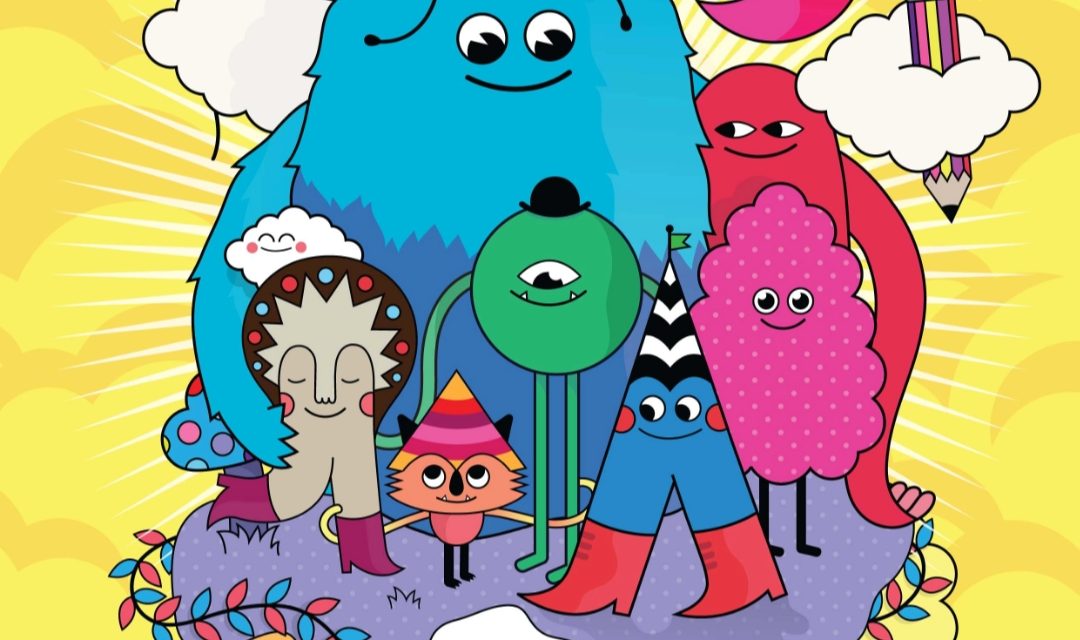
Adobe Illustrator tutorial: Create colourful vector character art
Hone your character design skills with this Illustrator vector art tutorial from onesidezero.
This Adobe Illustrator tutorial will teach you how to create a fully digital image from an initial sketch. You will learn how to control vector paths to create smooth angles and view the necessary stages to complete a piece of work in Adobe Illustrator. This tutorial demonstrates the stages taken from sketch to vector – covering colour adjustments, depth and composition.
Through learning these basic skills you will be able to create perfect characters that are scalable to any size, and which you can then enhance with finishing touches in Photoshop to achieve a truly eye-catching piece of work.
Step: 1
Begin by sketching out some rough ideas for characters: at this stage you don’t need to worry about creating a perfect image, so try to keep your drawings quite simple; making them too complex at this stage will make them much harder to trace later on.
Remember, you can always add shadows and details to your artwork at later stages, and can even sketch new parts and ideas on the computer as you go along.
Step: 2
When you’re happy with your characters, assemble them in a scene. Don’t worry too much about the exact layout and features; again, you can change these later in Illustrator, once you have scanned your sketch into your computer.
Step: 3
When you’ve finished your initial character sketches, scan them at 300dpi and save the image. Using 300dpi means that the images won’t be blurry when you come to use them later.
Step: 4
Open Illustrator and create a new A4 document and then select File > Place from the menu to browse to your scanned image.
Place your sketch in the document; to resize it click on the it and select Object > Transform > Scale from the menu. Tick the preview box and change the scale until it’s correct, then lock the layer in the Layers Panel.
Step: 5
Create a new layer and name it ‘character 1’. Select the Pen tool (P) with no fill and a bright colour as the stroke (X). Start tracing your character, using a dot-to-dot method to draw the lines; moving the cursor will create curved lines.
If lines cross, you can use the Scissor tool (C) to cut part of the line by clicking on it and deleting what you don’t want.
Step: 6
Repeat Step 5 to trace the outline for each character on a separate layer, adding a white fill to the characters once their outline is complete. To create rounded edges to lines, use the Brush option and change the Stroke as desired.
Step: 7
Once you’ve completed the outline of your drawing, spend a few minutes perfecting the lines. When that’s done, unlock one layer, click a part of the character with the Direct Selection tool (A) and choose a colour for the fill; you can change multiple colours by selecting shapes and using Edit > Edit Colors > Adjust Color Balance.
Step: 8
Begin to experiment with colour combinations; at this stage it’s not important to get the colours absolutely spot on as, you can easily amend these later. Using pastel colours is a good idea since vibrant colours can be distracting when you’re drawing lines.
Step: 9
Now you have a basic coloured image, you can begin to add details. To add depth draw a shadow inside the character’s body overlapping the edge of the shadow onto the character’s black outline, choose Darken in the transparency options and change the opacity to 30%.
Step: 10
Add shadows underneath your characters to create depth. Given that the floor your characters are standing on is a solid colour, you can use a simple gradient to fade the shadow. To draw a shadow use the Gradient tool (G) and play around with the shading. Alter the angle of the gradient until you’re happy with how it looks.
Step: 11
Once you’ve created shadows, you’re ready to add background items and detail to your work. In the Tools menu, hover over the Rectangle tool to select the Star tool. Click once in an empty area of the screen and change the option to 40 points or more if required. Resize the star and place as the bottom layer in the Layers palette.
Step: 12
Once you’ve added all the items to your work, you’re ready to start refining it. You can experiment by dropping in extra clouds at the base of the illustration and amending the colours to create a more vibrant piece.
Step: 13
To finalise the work, add a simple background. Choose a colour that complements the piece, use opacity where necessary and perhaps go for a subtle pattern that will flatter the bold outlines you’ve used in the main illustration.
Step: 14
Open the completed Illustrator file in Photoshop, select the colour mode as CMYK, choose the scale you want for your document and make some final colour corrections. That’s it – you’ve got a finished piece.
Sumber: https://www.digitalartsonline.co.uk/tutorials/adobe-illustrator/create-colourful-vector-character-art/


Recent Comments